
How to Use UTMs to track Facebook conversions in Google Analytics

Facebook and Instagram Ads are a great platform to promote engagement with your brand and hopefully convert those individuals into paying users. If you have any experience with Facebook Ads, however, you will know that seeing your Facebook data with your Google Analytics data often requires some “manipulation” on your end. In this article, we will show you how to use UTMs to track Facebook conversions in Google Analytics.
HOW:
- Set up Google Analytics Goal Tracking
- Install a Facebook Pixel on your site
- Create a Custom Conversion in Facebook Ads Manager
- Build Campaign URLs using the smart Facebook UTM Builder
- Track Conversions using Google Analytics Reports
- Track UTM link performance using the UTM Smart Manager
Upon implementing these steps, you’ll be on your way to understanding the critical marketing insights that will help you make the most out of your Facebook advertising strategy.
Why use UTMs to track facebook conversions if I have a Pixel?
Tracking Facebook Custom conversions through Google analytics will help you figure out why a Facebook-pixel reported conversion does not match your Google Analytics conversions. There’s a number of reasons why this might happen but the majority of the time it’s directly attributable to how Facebook defines their attribution window (28 days) and how Google defines theirs (last-click). I’m a fan of Facebook Custom Conversions because they can be tied to Google Analytics and thus give you deeper insights into your ad performance, how visitors interact with your site, and how ads compare to the other acquisition channels.
In this article, I will follow a marketing campaign example that wants to track Lead conversions. These leads are tracked when people land on a confirmation page after completing an action/event on your site (ie when they fill out a form). Depending on your goals, you may choose to track something else but the principles will still apply.
STEP 1: Create a Goal in Google Analytics
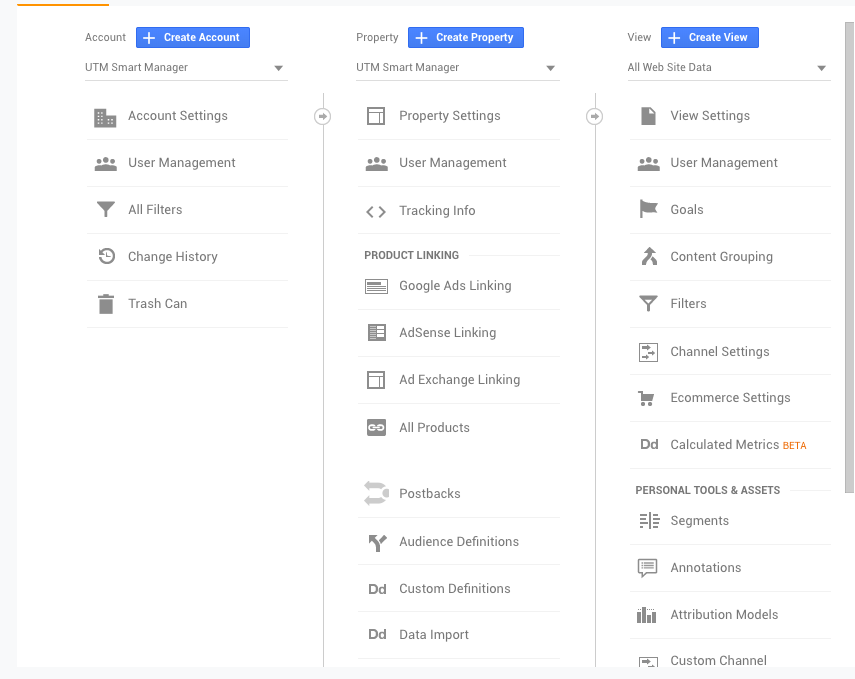
The first step to tracking your Facebook UTM conversions in Google Analytics is by creating a Goal in Google Analytics. To do this, find the Admin panel on your Google Analytics and click on the goals section (right hand column).
In the GOALS screen, create a new GOAL by clicking on the red button at the top. Then follow the steps to create a Custom Destination Goal that will track visits to the confirmation page that visitors reach after completing the conversion action (ie, completing the form). I’ve also added a funnel feature to make sure that I’m only tracking conversions that have arrived at the correct landing page (ie, the landing page URL from the ads).
Below is a quick snapshot to make this happen.
- Google Analytics > Admin > Goals > New Goal
- Custom > Destination > Equals to (drop down) = confirmationpage url (ie. landing-page.com/success
- Set up Funnel (On):
- Step 1: Screen / Page = landing page URL (required)
STEP 2: Install Facebook Pixel on your Site (or Google Tag Manager)
The Facebook Pixel is a valuable tool which theoretically allows Facebook to track activity from all of the pages on your website, including actions that came from your facebook ad. Here’s a good set of instructions for installing the facebook pixel: https://www.facebook.com/business/m/pixel-set-up-step-2
I prefer to add the Facebook pixel via a Google Tag Manager implementation. It’s just easier to manage for me. Here are the instructions to install the Facebook pixel via your Google Tag Manager implementation: https://www.facebook.com/business/help/1021909254506499
STEP 3: Create a Custom Conversion in Facebook Ads Manager
Facebook Ads Manager allows you to run ad campaigns specifically designed to drive conversions to your website or app. In this case, the Facebook ad objective is simple: Conversions (specifically form completions). We’ll set up a Custom Conversion to track leads, using the same URL as our Google Analytics goal (ie landing-page/success).
Quick guide:
- Facebook Ads Manager > Ads Manager Menu > All Tools > Measure & Report > Custom Conversions
- Create Custom Conversion > URL Contains: [URL] > Choose a Category: Lead > Source should be your Facebook Pixel, status: Active > Next
- Name your Conversion: I would name it the desired action_title of the page_campaign date to help me keep track
- Choose Conversion as your objective> Select Website, and choose your custom conversion in the drop down name
STEP 4: Build your Facebook Campaign URL (or your Facebook UTM) for your Landing Page
This is one of the most critical steps to get right in marketing analytics and yet, most marketers don’t do correctly. You need to use a good facebook UTM builder and build a campaign URL for the landing page you’ll be using in your Facebook ad. The simplest way to track your ad campaigns in Google Analytics is by creating a custom URL using UTM parameters.
WARNING: Stay away from the URL builders that do not implement a naming convention for you. Below is a screenshot of what not to use
We suggest you stay away from facebook UTM builders (like the one above) because it’s too hard to control the different ways in which UTM parameters are used. A typical scenario involves three people who write facebook as a source differently. One writes it down as “facebook”, another as “Facebook”, and a third person will write it as FB. In this instance, Google analytics will treat each one as a different source (even though they could all refer to the exact same ad set). In short, using the facebook UTM builder will create a data integrity problem in Google Analytics. Just don’t use it.
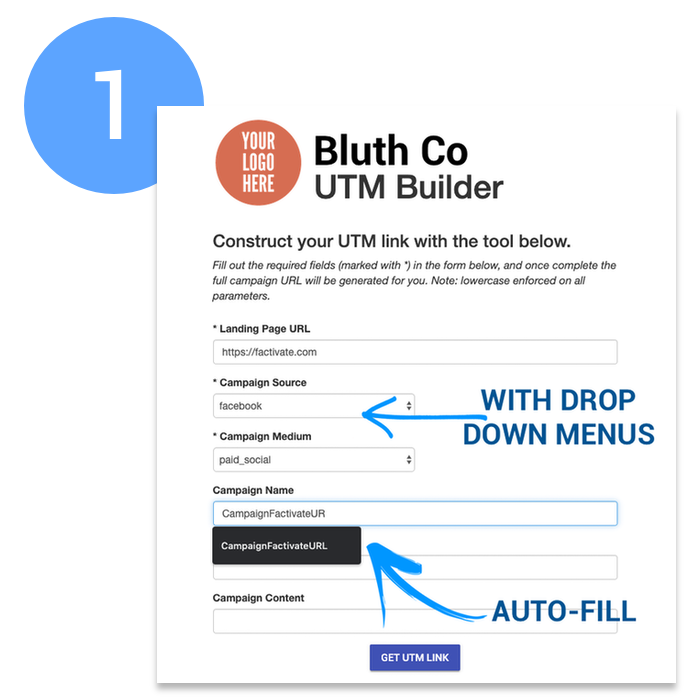
Now that you’ve been warned, we recommend you use a UTM builder that enforces naming conventions for your team or organization (like the one pictured below). This will allow you to easily create a custom URL that will tag visits and conversions on your site using parameters such as Campaign Name and Medium. In this case, we’re creating the custom URL for our Ad’s landing page (ie: /success)
Quick Guide:
- Go to a smart facebook UTM builder like the UTM Smart Manager
- Enter the landing page URL and fill in the following parameters:
- campaign source: (dropdown) facebook
- campaign medium: (dropdown) cpc
- Campaign Name: CampaignFactivateURL
- Campaign Term: Q1Conversions
- Campaign Content: bluebackground
- Click to get the URL and use this as the destination URL for your Facebook Ads
BONUS: if you used the UTM Smart Manager, every facebook UTM built will be stored for you automatically inside the UTM Library for future reference and historical analysis.
Advanced Tips:
- you might choose to create multiple campaign URLs because you might have different ad tests you’re going to run. In this case, you’ll just need to change the campaign content.
STEP 5: Track Conversions inside Google Analytics Conversions Reports
Unfortunately, Google Analytics does not combine your Facebook performance channel data with web engagement data in their reports. If you want that kind of contextual insights, it will require some manual effort on your part to get to an ROI or learn how many shares that ad received. If you’re looking for that type of auto reporting, skip to Step 6.
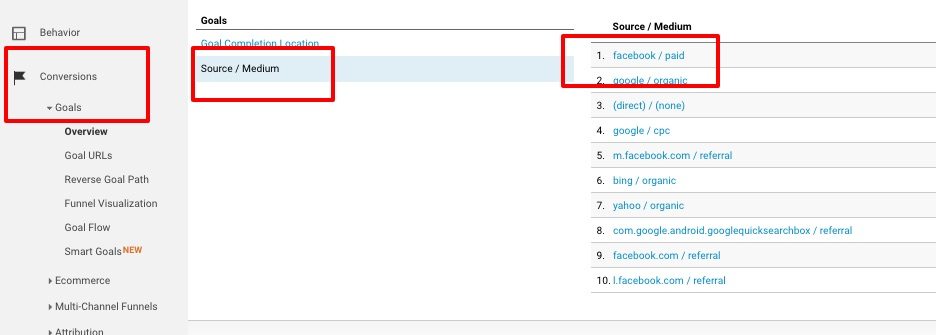
Now that you’ve gotten all set up out of the way, it’s time to see how your ad is performing using Google Analytics conversions reports. This information can be found in the Goals Overview report under Conversions. Selecting facebook under the Campaign Source will help you filter only the conversions from your facebook ads. Then, you can use secondary dimensions and advanced filters so you can narrow down your results by campaign name, medium, content, etc.
Quick snapshot:
- Google Analytics > Reporting > Conversions > Goals > Overview > Goals: Source (make sure you’ve selected the appropriate date range)
- Select facebook / cpc in the conversions drop-down menu. Then select the Goal > Goal Option: Select Goal
Expert Tips:
- Conversion data is important but you should consider the following KPIs as well to measure the success of your facebook conversion campaign:
- Avg. Session Duration: to tell you how long people engaged with your site and how long completion takes (good for understanding relevant audience)
- Avg. Bounce rate: how many people from your ad bounced (good for understanding ad relevance demographics)
- Goal completion rate: helps to check how your landing page is performing. If low, consider AB testing different elements to increase your rate.
STEP 6: Track Facebook UTM conversions (in Context) with Google Analytics data from one place
Now that you have a basic understanding of how your Facebook conversions should be tracked, it’s time to measure the success of your ad by understanding the customer’s click journey (ie, how did they interact with my ad all the way up to what conversion looked like). In this case, we will need to pull together the facebook ad data (spend, shares, comments, likes, CTR, relevance score) with your Google Analytics data (conversions, bounce rate, time on site, goal completion rate). Fortunately, pulling these insights into one place with the UTM Smart manager is automatically done for you and displayed in either an Executive Dashboard or Analyst view. Once the data is synced, all you need to do is scroll to the Top Campaign section to view the campaign data in one place.

Quick snapshot:
- Log into UTM Smart Manager > Connections
- Click on each of the data sources (ie Facebook Ads)> Log into Facebook > select your account > click OK
- Repeat for remaining 5 buttons (Adwords, FB Demos [pulls demo data from facebook ads], GA UTMs [pulls UTM data from GA], GA [generic GA data], and GA Demo [ pulls demographic data]
- Go to Exec Dashboard to view your results (make sure you type the correct date range in the top).
Conclusion:
With more and more data becoming available to us, it’s become challenging to know what to believe. The data discrepancies between a Facebook pixel-reported data point and Google Analytics data point can be so significant that it can lead to some very real headaches that can cost you a lot of money. By following the steps above on the correct way to build facebook UTMs and the best ways to analyze them, you will be able to accurately understand which facebook ads are performing best and which ones need to be stopped right away. Best of all, by using the UTM Smart Manager, you’ll be able to view your Facebook campaign data alongside your website, Adwords, and other channels in one place; thus allowing you to make the best decisions on your campaign and marketing efforts.